-
[nahmii] Nahmii3.0 Testnet Incentive Program - E단계테스트넷 2023. 4. 10. 20:33
E단계는 NUSD를 생성해서 예금하고 출금해 보기입니다. 난이도가 갑자기 뚝 떨어졌네요.ㅋ

E1은 설명에 나온데로 '계약하다' 링크를 타고 들어한 후 지갑을 연결합니다.
Nahmii USD (NUSD) Token Tracker | Etherscan
5번 faucet 누른 후 write 클릭

1회에 1,000 NUSD가 입금됩니다.

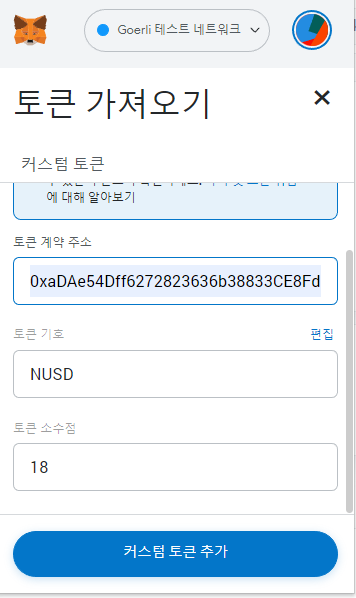
NUSD가 들어온 걸 확인하려면 네트워크가 Georli 테스트넷에서 토큰추가 > 아래 컨트랙트주소 붙여넣기 후 완료


E2는 Georli 테스트넷의 NUSD를 Nahmii 테스트넷 NUSD로 예금하는 것입니다.
이미 브릿지 사용을 해 보았죠~ A단계
https://bridge.testnet.n3.nahmii.io/bridge
지갑 연결 후 토큰을 NUSD로 선택합니다. 그리고 금액은 max로 한 후 APPROVE (1차 지출한도 승인 후) -> DEPOSIT
(음..가스비...) 조금 기다리다보면..완료E3는 반대 즉 출금입니다. Withdraw 탭을 누르고 메타마스크의 네트워크를 변경합니다.
여기서도 토큰을 NUSD로 선택 > 좀전에 받은 만큼 또는 적당히 금액 입력 > WITHDRAW 실행 > 네트워크가 전환되면서 이력 페이지로 이동 > 최종처리를 위해 Claimable 을 눌러서 승인처리
(이놈의 이더 가스비... 충전하고 와야할 듯 ㅜㅜ)


'테스트넷' 카테고리의 다른 글
[ALLsTo] vALS 테스트 토큰 받고 테스트 참여하기 (1) 2023.04.12 [SharDex] shardeum 테스트넷 사용하여 에어드랍 받기 (1) 2023.04.11 [nahmii] Nahmii3.0 Testnet Incentive Program - C단계 (0) 2023.04.10 [nahmii] Nahmii3.0 Testnet Incentive Program - B단계 (0) 2023.04.10 [nahmii] Nahmii3.0 Testnet Incentive Program - A단계 (0) 2023.04.10